How vision systems are deployed for 100% cosmetic defect detection (with examples)

Cosmetic defects are the bane of manufacturers across all industries. Producing a product with the correct quality in terms of measurement, assembly, form, fit, and function is one thing – but cosmetic defects are more easily noticed and flagged by the customer and end-user of the product. Most of the time, they have no detrimental effect on the use or function of the product, component or sub-assembly, they just don’t look good! They are notoriously difficult for an inspection operator to spot and are therefore harder to check using traditional quality control methods. The parts can be checked on a batch or 100% basis for measurement and metrology checks, but you can’t batch-check for a single cosmetic defect in a high-speed production process. So for mass production medical device manufacturing at 300-500 parts per minute, using vision systems for automated cosmetic defect inspection is the only approach.

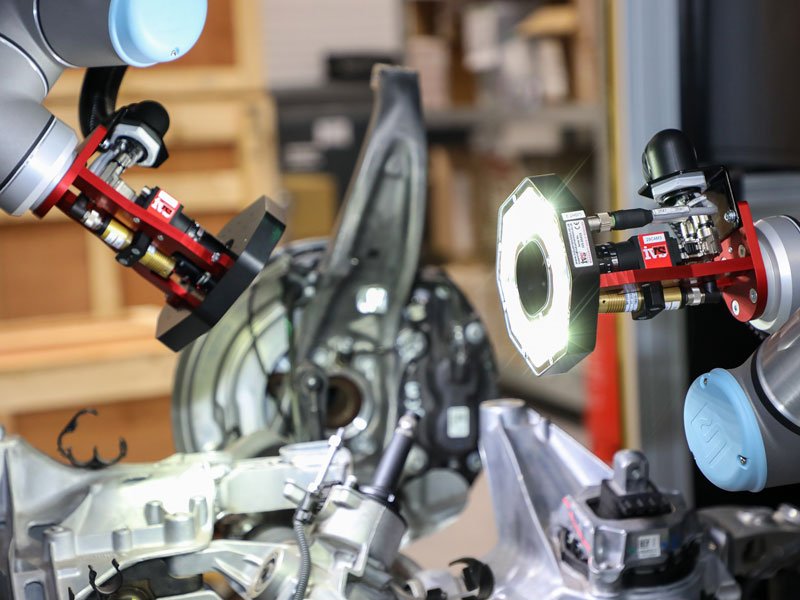
From medical device manufacturers, cosmetic defects might manifest themselves as inclusions, black spots, scratches, marks, chips, dents or a foreign body on the part. For automotive manufacturers, it could be the wrong position of a stitch on a seat body, defects on a component, a mark on a sub-assembly, or the gap and flush of the panels on a vehicle.

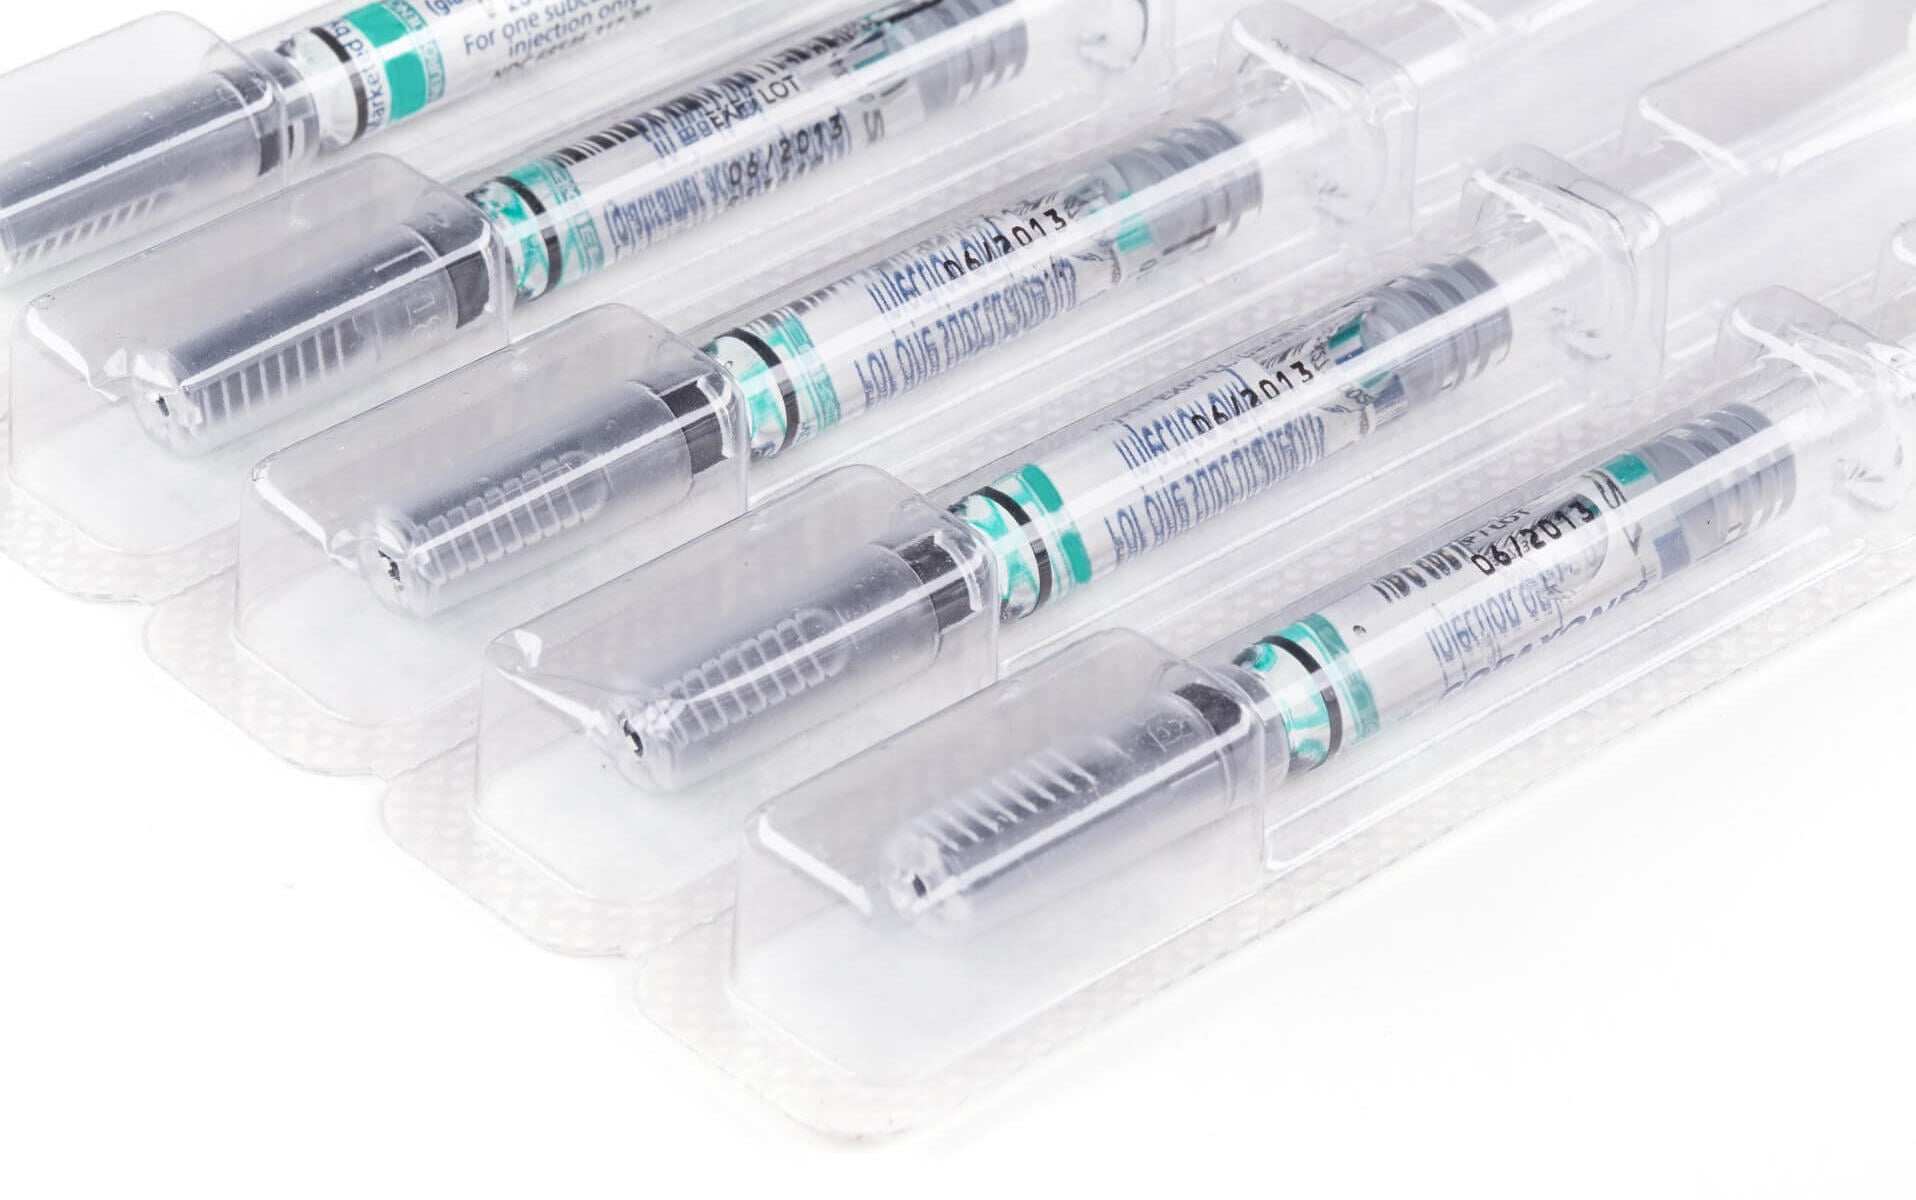
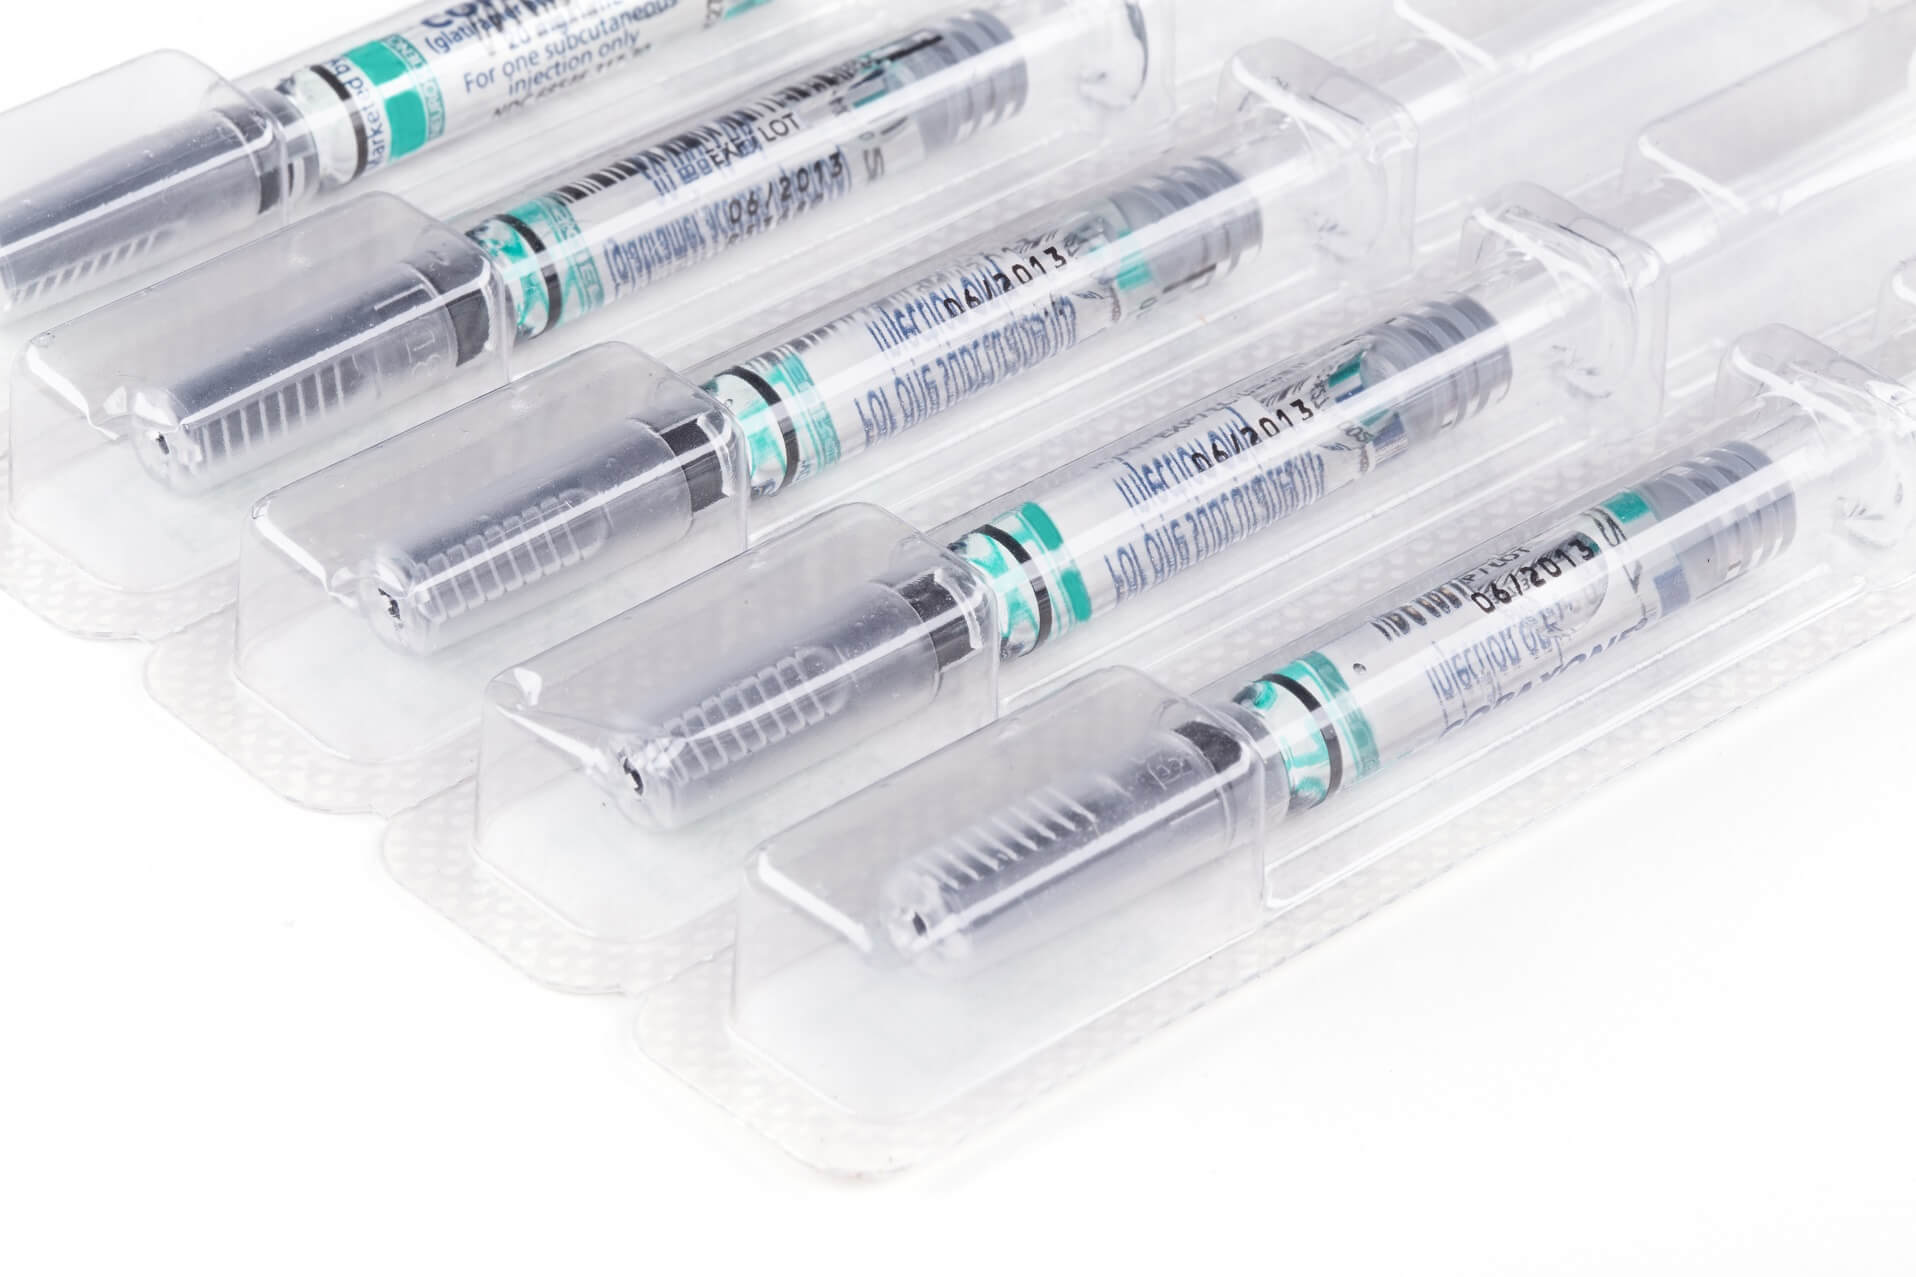
Using vision systems for automated cosmetic inspection is especially important for products going to the Japanese and the Asian markets. These markets are particularly sensitive to cosmetic issues on products, and medical device manufacturers need to use vision systems to 100% inspect every product produced to confirm that no cosmetic defects are present on their products. This could be syringe bodies, vials, needle tips, ampules, injector pen parts, contact lenses, medical components and wound care products. All need checking at speed during the manufacturing and high-speed assembly processes.

How are vision systems applied for automated cosmetic checks?

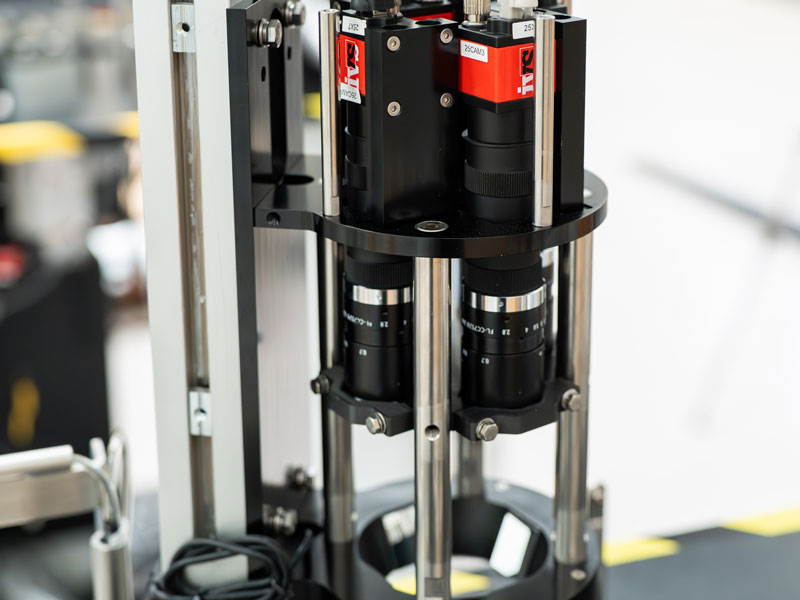
The key to applying vision systems for cosmetic visual inspection is the combination of camera resolutions, optics (normally telecentric in nature) and filters to bring out the specific defect to provide the ability to segment it from the natural variation and background of the product. Depending on the type of cosmetic defect that is being checked, it may also require a combination of either linescan, areascan or 3D camera acquisition. For example, syringe bodies or vials can be spun in front of a linescan camera to provide an “unrolled” view of the entire surface of the product.

Let’s drill down on some of the specific elements which are used, using the syringe body as a reference (though these methods can be applied to other product groups):

Absorbing defects

These defects are typically impurities, particulates, fibers and bubble. This needs a lighting technique with linescan to provide a contrasting element for these defects:

Hidden defects

These defects are typically “hidden” from view via the linescan method and so using a direct on-axis approach with multiple captures from an areascan sensor will provide the ability to notice surface defects such as white marks (on clear and glass products) and bubbles.

Cracks and scratch defects

A number of approaches can be taken for this, but typically applying an axial illuminiation with a combination of linescan rotation will provide the ability to identify cracks, scratches and clear fragments.

Why do we use telecentric optics in cosmetic defect detection?

Telecentric lenses are optics that only gather collimated light ray bundles (those that are parallel to the optical axis), hence avoiding perspective distortions. Because only rays parallel to the optical axis are admitted, telecentric lens magnification is independent of object position. Due to this distinguishing property, telecentric lenses are ideal for measuring and cosmetic inspection applications where perspective problems and variations in magnification might result in inconsistent measurements. The front element of a telecentric lens must be at least as large as the intended field of view due to its construction, rendering telecentric lenses insufficient for imaging very large components.

Fixed focal length lenses are entocentric, catching rays that diverge from the optical axis. This allows them to span wide fields of view, but because magnification varies with working distance, these lenses are not suitable for determining the real size of an item. Therefore, telecentric optics are well suited for cosmetic and surface defect detection, often combined with collimated lighting to provide the perfect silhouette of a product.

In conclusion, machine vision systems can be deployed effectively for 100% automated cosmetic defect detection. By combining the correct optics, lighting, filters and camera technology, manufacturers can use a robust method for 100% automated visual inspection of cosmetic and surface defects.

How to calibrate optical metrology systems to ensure precise measurements

Optical metrology systems play a crucial role in various industries, enabling accurate and reliable measurements for quality control, inspection, and manufacturing processes. To ensure precise and consistent results, it is essential to calibrate these systems meticulously. By understanding the significance of calibration, considering key factors, and implementing regular calibration practices, organizations can optimise the performance of these systems. Accurate measurements obtained through properly calibrated optical metrology systems empower industries to maintain quality control, enhance efficiency, and drive continuous improvement.

How to calibrate your industrial vision system.

We’re often asked about the process for carrying out calibration on our automated vision inspection machines. After all, vision systems are based on pixels whose size is arbitrarily dependent on the sensor resolutions, fields-of-view and optical quality. It’s important that any measurements are validated and confirmed from shift-to-shift, day-to-day. Many vision inspection machines are replacing stand-alone slow probing metrology-based systems, or if it’s an in-line system, it will be performing multiple measurements on a device at high speed. Automating metrology measurement helps reduce cycle time and boost productivity in medical device manufacturing; therefore, accuracy and repeatability are critical.

In the realm of optical metrology, the utilisation of machine vision technology has brought about a transformative shift. However, to ensure that the results of the vision equipment have a meaning that everyone understands, the automated checks must be calibrated against recognised standards, facilitating compliance with industry regulations, certifications, and customer requirements.

The foundational science that instils confidence in the interpretation and accuracy of measurements is known as metrology. It encompasses all aspects of measurement, from meticulous planning and execution to meticulous record-keeping and evaluation, along with the computation of measurement uncertainties. The objectives of metrology extend beyond the mere execution of measurements; they encompass the establishment and maintenance of measurement standards, the development of innovative and efficient techniques, and the promotion of widespread recognition and acceptance of measurements.

For metrology measurements, we need a correlation between the pixels and the real-world environment. For those of you who want the technical detail, we’re going to dive down into the basis for the creation of individual pixels and how the base pixel data is created. In reality, the users of our vision systems need not know this level of technical detail, as the main aspect is the calibration process itself – so you can skip the next few paragraphs if you want to!

The camera sensor is split into individual pixels in machine vision. Each pixel represents a tiny light-sensitive region that, when exposed to light, creates an electric charge. When an image is acquired, the vision system captures the amount of charge produced at each pixel position and stores it in a memory array. A protocol is used to produce a uniform reference system for pixel positions. The top left corner of the picture is regarded the origin, and a coordinate system with the X-axis running horizontally across the rows of the sensor and the Y-axis running vertically down the columns is utilised.

The pixel positions inside the image may be described using the X and Y coordinates in this coordinate system. For example, the top left pixel is called (0,0), the pixel to its right is called (1,0), the pixel below it is called (0,1), and so on. This convention enables the image’s pixels to be referred to in a consistent and standardised manner. So this method provides a way (in combination with sub-pixel processing) to provide a standard reference coordinate position for a set of pixels combined to create an edge, feature or “blob”.

In machine vision, metrology calibration involves the mapping of the pixel coordinates of the vision system sensor back to real-world coordinates. This “mapping” ties the distances measured back to the real-world measurements, i.e., back to millimetres, microns or other defined measurement system. In the absence of a calibration, any edges, lines or points measured would all be relative to pixel measurements only. But quality engineers need real, tangible measurements to validate the production process – so all systems must be pre-calibrated to known measurements.

The process of calibration ensures traceability of measurements to recognised standards, facilitating compliance with industry regulations, certifications, and customer requirements. It enhances the credibility and trustworthiness of measurement data.

How do you calibrate the vision system in real-world applications?

Utilising certified calibration artifacts or reference objects with known dimensions and properties is essential. These standards serve as benchmarks for system calibration, enabling the establishment of accurate measurement references. Proper calibration guarantees that measurements are free from systematic errors, ensuring the reliability and consistency of the data collected. The method of calibration will depend on if the system is a 2D or 3D vision system.

For a 2D vision system, common practice is to use slides with scales carved or printed on them, referred to as micrometre slides, stage graticules, and calibration slides. There is a diverse range of sizes, subdivision accuracy, and patterns of the scales. These slides are used to measure the calibration of vision systems. These calibration pieces are traceable back to national standards, which is key to calibrating the vision inspection machine effectively. A machined piece can also be used with traceability certification, this is convenient when you need a specific measurement to calibrate from for your vision metrology inspection.

One form of optical distortion is called linear perspective distortion. This type of distortion occurs when the optical axis is not perpendicular to the object being imaged. A chart can be used with a pre-defined pattern to compensate for this distortion through software. The calibration system does not compensate for spherical distortions and aberrations introduced by the lens, so this is something to be aware of.

For 3D vision, you no longer need pricey bespoke artefacts or specifically prepared calibration sheets. Either the sensor is factory calibrated or a single round item in the shape of a sphere suffices. Calibrate and synchronise the vision sensor by sending calibrated component measurements to the IVS machine. You will instantly receive visible feedback that you may check and assess during the calibration process.

How often do I need to re-calibrate a vision system?

We often get asked this question, since optimal performance and accuracy of optical metrology systems can diminish over time due to factors like wear and tear or component degradation. Establishing a regular calibration schedule ensures consistent and reliable measurements. However, it’s often down to the application requirements, and the customer needs based on their validation procedures. This can take place once a shift, every two weeks, one a month or even once a year.

One final aspect is storage, all our vision inspection machines come with calibration storage built into the machine itself. It’s important to store the calibration piece carefully, use it as determined from the validation process, and keep it clean and free from dirt.

Overall, calibration is often automatic, and the user need never know this level of detail on how the calibration procedure operates. But it’s useful to have an understanding of the pixel to real-world data and to know that all systems are calibrated back to traceable national standards.

The complete guide to Artificial Intelligence (AI) and Deep Learning (DL) for machine vision systems.

Where are we at, and what is the future?

We had a break from the blog last month while we worked on this latest piece, as it’s a bit of a beast. This month we discuss artificial intelligence (AI) for machine vision systems. An area with much hype due to the introduction of AI language models such as ChatGPT and AI image models like DALLE. AI is starting to take hold for vision systems, but what’s it all about? And is it viable?

Where are we at?

Let’s start at the beginning. The term “AI” is an addendum for a process that has been around for the last twenty years in machine vision but has only now become more prolific (or should we say, the technology has matured to the point of mass deployment). We provided vision systems in the early 00’s using low-level neural networks for feature differentiation and classification. These were primarily used for simple segmentation and character verification. These networks were basic and had limited capability. Nonetheless, the process we used then to train the network is the same as it is now, but on a much larger scale. Back then, we called it a “neural network”; now it’s termed artificial intelligence.

The term artificial intelligence is coined as the network has some level of “intelligence” to learn by example and expand its knowledge on iterative training levels. The initial research into computer vision AI discovered that human vision has a hierarchical structure on how neurons respond to various stimuli. Simple features, such as edges, are detected by neurons, which then feed into more complex features, such as shapes, which finally feed into more complex visual representations. This builds individual blocks into “images” the brain can perceive. You can think of pixel data in industrial vision systems as the building blocks of synthetic image data. Pixel data is collected on the image sensor and transmitted to the processor as millions of individual pixels of differing greyscale or colour. For example, a line is simply a collection of like-level pixels in a row with edges that transition pixel by pixel in grey level difference to an adjacent location.

Neural networks AI vision attempts to recreate how the human brain learns edges, shapes and structures. Neural networks consist of layers of processing units. The sole function of the first layer is to receive the input signals and transfer them to the next layer and so on. The following layers are called “hidden layers”, because they are not directly visible to the user. These do the actual processing of the signals. The final layer translates the internal representation of the pattern created by this processing into an output signal, directly encoding the class membership of the input pattern. Neural networks of this type can realise arbitrarily complex relationships between feature values and class designations. The relationship incorporated in the network depends on the weights of the connections between the layers and the number of layers – and can be derived by special training algorithms from a set of training patterns. The end result is a “web” of connections between the networks in a non-linear fashion. All of this is to try and mimic how the brain operates in learning.

With this information in hand, vision engineering developers have been concentrating their efforts on digitally reproducing human neural architecture, which is how the development of AI came into being. When it comes to perceiving and analysing visual stimuli, computer vision systems employ a hierarchical approach, just like their biological counterparts do. Traditional machine vision inspection continued in this vein, but AI requires a holistic view of all the data to compare and develop against.

So, the last five years have seen an explosion in the development of artificial intelligence, deep learning vision systems. These systems are based on neural network development in computer vision in tandem with the development of AI in other software engineering fields. All are generally built on an automatic differentiation library to implement neural networks in a simple, easy-to-configure solution. Deep learning AI vision solutions incorporate artificial intelligence-driven defect finding, combined with visual and statistical correlations, to help pinpoint the core cause of a quality control problem.

To keep up with this development, vision systems have evolved into manufacturing AI and data gathering platforms, as the need for vision data for training becomes an essential element for all AI vision systems compared to deploying traditional machine vision algorithms. Traditional vision algorithms still need image data for development, but not to the same extent as needed for deep learning. This means vision platforms have developed to integrate visual and parametric data into a single digital thread from the development stage of the vision project all the way through production quality control deployment on the shop floor.

In tandem with the proliferation of the potential use of AI in vision systems is the explosion in suppliers of data-gathering “AI platforms”. These systems are more of a housekeeping exercise for image gathering, segmentation and human classification before the submission to the neural network, rather than being a quantum leap in image processing or a clear differential compared to traditional machine vision. Note: most of these companies have “AI” in their titles. These platforms allow for clear presentation of the images and the easy submission to the network for computation of the neural algorithm. Still, all are based on the same overall architecture.

The deep learning frameworks – Tensorflow or PyTorch – what are they?

Tensorflow and PyTorch are the two main deep learning frameworks developers of machine vision AI systems use. Each was developed by Google and Facebook, respectively. They are used as a base for developing the AI models at a low level, generally with a graphical user interface (GUI) above it for image sorting.

TensorFlow is a symbolic math toolkit that is best suited for dataflow programming across a variety of workloads. It provides many abstraction levels for modelling and training. It’s a promising and rapidly growing deep learning solution for machine vision developers. It provides a flexible and comprehensive ecosystem of community resources, libraries, and tools for building and deploying machine-learning apps. Recently, Tensorflow has integrated Keras into the framework, a precursor to Tensorflow.

PyTorch is a highly optimised deep learning tensor library built on Python and Torch. Its primary use is for applications that use graphics processing units (GPUs) and central processing units (CPUs). Vision system vendors favour PyTorch over other Deep Learning frameworks such as TensorFlow and Keras because it employs dynamic computation networks and is entirely written in Python. It gives researchers, software engineers, and neural network debuggers the ability to test and run sections of the code in real-time. Because of this, users do not have to wait for the entirety of the code to be developed before determining whether or not a portion of the code works.

Whichever solution is used for deployment, the same pros and cons apply in general to machine vision solutions utilising deep learning.

What are the pros and cons of using artificial intelligence deep learning in machine vision systems?

Well, there are a few key takeaways when considering using artificial intelligence deep learning in vision systems. These offer pros and cons when considering whether AI is the appropriate tool for industrial vision system deployment.

Cons

Industrial machine vision systems must have high yield, so we are talking 100% correct identification of faults, in substitute for accepting some level of false failure rate. There is always a trade-off in this process in setting up vision systems to ensure you err on the side of caution so that real failures are guaranteed to be picked up and automatically rejected by the vision system. But with AI inspection, the yields are far from perfect, primarily because the user has no control of the processing functionality that has made the decision on what is deemed a failure. A result of pass or fail is simply given for the outcome. The neural network having been trained from a vast array of both good and bad failures. This “low” yield (though still above 96%) is absolutely fine for most requirements of deep learning (e.g. e-commerce, language models, general computer vision), but for industrial machine vision, this is not acceptable in most application requirements. This needs to be considered when thinking about deploying deep learning.

It takes a lot of image data. Sometimes thousands, or tens of thousands of training images are required for the AI machine vision system to start the process. This shouldn’t be underestimated. And think about the implications for deployment in a manufacturing facility –you have to install and run the system to gather data before the learning part can begin. With traditional machine vision solutions, this is not the case, development can be completed before deployment, so the time-to-market is quicker.

Most processing is completed on reduced-resolution images. It should be understood that most (if not all) deep learning vision systems will reduce the image size down to a manageable size to process in a timely manner. Therefore, resolution is immediately lost from a mega-pixel resolution image down to a few hundred pixels. Data is compromised and lost.

There are no existing data sets for the specific vision system task. Unlike AI deep learning vision systems used in other industries, such as driverless cars or crowd scene detection, there are usually no pre-defined data sets to work from. In those industries, if you want to detect a “cat”, “dog”, or “human”, there is available data sources for fast-tracking the development of your AI vision system. Invariably in industrial machine vision, we look at a specific widget or part fault with no pre-determined visual data source to refer to. Therefore, the image data has to be collected, sorted and trained.

You need good, bad and test images. You need to be very careful in selecting the images into the correct category for processing. A “bad” image in the “good” pile of 10,000 images is hard to spot and will train the network to recognise bad as good. So, the deep learning system is only as good as the data provided to it for training and how it is categorised. You must also have a set of reference images to test the network with.

You sometimes don’t get definitive data on the reason for failure. You can think of the AI deep learning algorithm as a black box. So, you feed the data in and it will provide a result. Most of the time you won’t know why it passed or failed a part, or for what reason, only that it did. This makes deploying such AI vision systems into validated industries (such as medical devices, life sciences and pharmaceuticals) problematic.

You need a very decent GPU & PC system for training. A standard PC won’t be sufficient for the processing required in training the neural network. While the PC used for the runtime need be nothing special, your developers will need a high graphics memory PC with a top-of-the-range processer. Don’t underestimate this.

Pros

They do make good decisions in challenging circumstances. Imagine your part requiring automated inspection has a supplier constantly supplying a changing surface texture for your widget. This would be a headache for traditional vision systems, which is almost unsolvable. For AI machine vision, this sort of application is naturally suited.

They are great for anomaly detection which is out of the ordinary. One of the main benefits of AI-based vision systems is the ability to spot a defect that has never been seen before and is “left field” from what was expected. With traditional machine vision systems, the algorithm is developed to predict a specific condition, be it the grey scale of a feature, the size in pixels which deems a part to fail, or the colour match to confirm a good part. But if your part in a million that is a failure has a slight flaw that hasn’t been accounted for, the traditional machine vision system might miss it, whereas the AI deep learning machine vision system might well spot it.

They are useful as a secondary inspection tactic. You’ve exhausted all traditional methods of image processing, but you still have a small percentage of faults which are hard to classify against your known classification database. You have the image data, and the part fails when it should, but you want to drill down to complete a final analysis to improve your yield even more. This is the perfect scenario for AI deep learning deployment. You have the data, understand the fault and can train on lower-resolution segments for more precise classification. This is probably where AI deep learning vision adoption growth will increase over the coming years.

They are helpful when traditional algorithms can’t be used. You’ve tried all conventional segmentation methods, pixel measurement, colour matching, character verification, surface inspection or general analysis – nothing works! This is where AI can step in. The probable cause of the traditional algorithms not operating is the consistency in the part itself which is when deep learning should be tried.

Finally, it might just be the case that deep learning AI is not required for the vision system application. Traditional vision system algorithms are still being developed. They are entirely appropriate to use in many applications where deep learning has recently become the first point of call for solving the machine vision requirement. Think of artificial intelligence in vision systems as a great supplement and a potential tool in the armoury, but to be used wisely and appropriately for the correct machine vision application.

Learn more about Artificial Intelligence (AI) Deep Learning here:

View Page

Automated Vision Metrology: The Future of Manufacturing Quality Control

In-line visual quality control is more crucial than ever in today’s competitive medical device production environment. To keep ahead of the competition, manufacturers must ensure that their products fulfil the highest standards. One of the most effective ways to attain this goal is through automated vision metrology using vision technology.

So what do we mean by this? There are several traditional methods that a quality manager uses to keep tabs on the production quality. In the past, this would have been the use of a collection of slow CMM metrology machines to inspection the product one at a time. CMMs measure the coordinates of points on a part using a touch probe. This information can then be used to calculate the dimensions, surface quality and tolerances of the part. So we are not talking about high-speed vision inspection solutions in this context, but the precise, micron level, precision metrology inspection for measurements and surface defects.

The use of computer-controlled vision inspection equipment to measure and examine products is known as automated vision metrology. These vision systems offer several advantages over manual inspection CMM-type probing methods. For starters, automated metrology is faster. This is due to the fact that machines can perform measurements with great precision and repeatability at speed, as there is no need to touch the product, it’s non-contact vision assessment. Second, real-time inspection of parts is possible with automated metrology. This enables firms to detect and rectify flaws early in the manufacturing process, before they become costly issues.

Advantages of Automated Vision Metrology
The use of automated metrology in manufacturing has many intrinsic benefits. These include:

  • Decreased inspection time: Compared to manual inspection procedures, automated vision metrology systems can inspect parts significantly faster. This can save a significant amount of time during the manufacturing process.
  • Specific CTQ: Vision inspection systems can be set to measure specific critical to quality elements with great precision and reproducibility.
  • Non-contact vision inspection: As the vision camera system has no need to touch the product, it has no chance of scratching or adding to the surface quality problems which a touch probe inevitably has. This is especially important in industries such as orthopaedic joint and medical device tooling manufacturing.
  • Enhanced productivity: Automated vision metrology systems can be equipped with autoloaders, allowing for the fast throughput of products without the need for an operator to manually load a product into a costly fixture. Manufacturers can focus on other tasks that demand human judgement and inventiveness by freeing up human workers from manual inspection tasks.

Modern production relies heavily on automated vision metrology. It has several advantages, including enhanced accuracy, less inspection time, improved quality control, increased production, and higher product quality. With automated loading options now readily available, speed of inspection for precision metrology measurements can be completed at real production rates.

Overall, automated vision metrology is a potent tool for improving the quality and efficiency of production processes. It is an excellent addition to any manufacturing organisation wanting to increase quality control at speed, and make inspection more efficient compared to traditional CMM probing methods.

Clinical insight: 3 ways to minimise automated inspection errors in your medical device production line

Your vision system monitoring your production quality is finally validated and running 24/7, with the PQ behind you it’s time to relax. Or so you thought! It’s important that vision systems are not simply consigned to maintenance without an understanding of the potential automated inspection errors and what to look out for once your machine vision system is installed and running. These are three immediate ways to minimise inspection errors in your medical device, pharma or life science vision inspection solution.

1. Vision system light monitor.
As part of the installation of the vision system, most modern machine vision solutions in medical device manufacturing will have light controllers and the ability to compensate for any changes in the light degradation over time. Fading is a slow process but needs to be monitored. LEDs are made up of various materials such as semiconductors, substrates, encapsulants, and connectors. Over time, these materials can degrade, leading to reduced light output and colour shift. It’s important in a validated solution to understand these issues and have either an automated approach to the changing light condition through close loop control of grey level monitoring, or a manual assessment on a regular interval. It’s something to definitely keep an eye on.

2. Calibration pieces.
For a vision machines preforming automated metrology inspection the calibration is an important aspect. The calibration process will have been defined as part of the validation and production plan. Typically the calibration of a vision system will normally in the form of a calibrated slide with graticules, a datum sphere or a machined piece with traceability certification. Following from this would have been the MSA Type 1 Gauge Studies, this the starting point prior to a G R&R to determine the difference between an average set of measurements and a reference value (bias) of the vision system. Finally the system would be validated with the a Gauge R&R, which is an industry-standard methodology used to investigate the repeatability and reproducibility of the measurement system. So following this the calibration piece will be a critical part of the automated inspection calibration process. It’s important to store the calibration piece carefully, use it as determined from the validation process and keep it clean and free from debris. Make sure your calibration pieces are protected.

3. Preventative maintenance.
Vision system preventative maintenance is essential in the manufacturing of medical devices because it helps to ensure that the vision systems performs effectively over the intended lifespan. Medical devices are used to diagnose, treat, and monitor patients, and they play an important part in the delivery of healthcare. If these devices fail, malfunction, or are not properly calibrated, substantial consequences can occur, including patient damage, higher healthcare costs, and legal culpability for the manufacturer. Therefore, any automated machine vision system which is making a call on the quality of the product (at speed), must be maintained and checked regularly. Preventative maintenance of the vision systems involves inspecting, testing, cleaning, and calibrating the system on a regular basis, as well as replacing old or damaged parts.

Medical device makers benefit from implementing a preventative maintenance for the vision system in the following ways –
Continued reliability: Regular maintenance of the machine vision system can help identify and address potential issues before they become serious problems, reducing the risk of device failure and increasing device reliability.
Extend operational lifespan: Regular maintenance can help extend the lifespan of the vision system, reducing the need for costly repairs and replacements.
Ensure regulatory compliance: Medical device manufacturers are required to comply with strict regulatory standards (FDS, GAMP, ISPE) and regular maintenance is an important part of meeting these standards.

These three steps will ultimately help to lessen the exposure of the manufacture to production faults, and stop errors being introduced into the medical devices vision system production process. By reducing errors in the machine vision system the manufacturer can keep production running smoothly, increase yield and reduce downtime.

IVS and AMRC announce smart workbench of the future

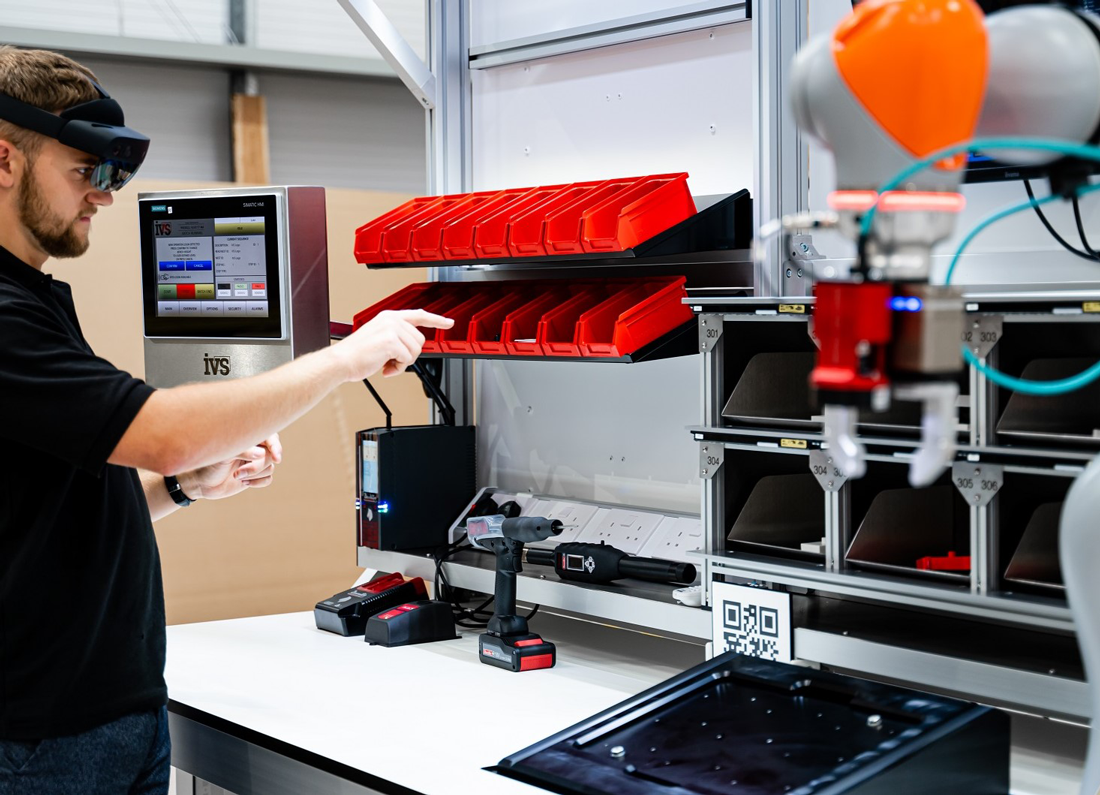
A next-generation smart workbench to showcase the latest production technologies has been developed by IVS in collaboration with AMRC Cymru. The Smart Workbench combines a mixed reality headset, smart tooling, 3D and 2D machine vision, seven-axis robotics, intelligent projection, pick-to-light and automation into one complete demonstration cell. The bench is designed to showcase the combined use of these cutting-edge technologies in a cell which can be used for demonstrations, research and development at AMRC Cymru, which is part of the University of Sheffield Advanced Manufacturing Research Centre (AMRC) and the High Value Manufacturing Catapult cluster of research centres.

IVS combined the mixed reality environment with the various disparate tools and robotic assembly build, providing a step-by-step process control for an engineer to follow. With the mixed reality unit being an integral component, IVS has developed a template for an immersive inspection environment to assist users. AMRC Cymru will then use the data gathered from these processes to dig deeper into the potential applications of these tech combos in future manufacturing settings.

Earl Yardley, Industrial Vision Systems Director, said: “We’re very excited about the work we have completed with AMRC Cymru. We see the increased use of Mixed Reality combined with industrial automation and machine vision as a pivotal technology for next-generation factories. Imagine operators with physical items around them, such as components and assemblies, but with the ability to also interact with digital content, such as a shared document that updates in real-time to the cloud or instruction animations for assembly. That is, in essence, the promise of mixed reality. It’s an incredibly exciting technology for future production environments.”

The smart workbench also combines both 2D and 3D machine vision. By generating a point cloud of information, 3D machine vision enables the vision system to inspect and confirm positional off-sets with the robot, facilitating the automated inspection of complicated assemblies, subassemblies, and individual components. Together with a collaborative seven-axis robot arm, this enables the benchtop assembly of parts on the smart workbench. This is an essential area of research for future manufacturing settings since it can be paired with the pick-to-light system for full collaboration between humans and robots.

Andrew Silcox, research director at AMRC Cymru, said: “We are delighted to be working with IVS to develop SMART workstation applications for our industrial partners. AMRC Cymru believes that SMART workstations equipped with collaborative robot technologies will be a key component of our future factories as they enable us to merge the productivity and repeatability of automation with the adaptability and dexterity of a human.”

The smart workbench also includes operator traceability and security with RFID (Radio-frequency identification) tags providing the ability for the bench to adjust according to the operator’s height and store data against the operator ID. This is linked to the factory information system at AMRC Cymru, and, ultimately to AMRC’s bespoke Factory+ demonstrating how data exchange to factory information systems, and clear human-machine interfaces, are critical elements for the factory of tomorrow.

It is hoped the Smart Workbench can be utilised by all members and visitors of AMRC Cymru to research future ideas and concepts for manufacturing knowledge. Combining different production process elements in unique combinations, the smart workbench is seen as a modern tool for the future of manufacturing technology.

Zytronic invests in IVS capital equipment to deliver future growth

Zytronic – the projected capacitive touch technology specialist – has invested approaching £400k in a second bespoke laser soldering system installed within another factory cleanroom, providing risk mitigation and interchangeable production capabilities across the entire UK-based manufacturing operation. Industrial Vision Systems Ltd (IVS), a global supplier of precision visual inspection systems and industrial automation solutions, developed the unique automated vision & laser welding system in collaboration with the Technical, Quality and Production teams at Zytronic.

This new automated system allows Zytronic to leverage the latest production technology, providing increased productivity, higher yields and enhanced manufacturing capability. The machine combines 2D camera vision with precision drives, and custom software to deliver precise, contactless laser welding of controller flex tails to the touch sensors. This capability increases Zytronic’s ability to complete the critical soldering process on its glass and film projective capacitive (PCAP) touch sensors, even in small quantities, irrespective of size or design in record time.

“The investment in this next-generation laser bonding system supports our continued drive for yield improvements and accelerating throughput,” said Mark Cambridge, Managing Director, Zytronic. “One of the key areas we have advanced with this new production cell is the precise soldering of our 10-micron diameter copper sensing elements to the microns-thin gold/tin pads within the flexible tails that we use to connect to our proprietary touch controllers. This new and more advanced system complements the one we installed in another cleanroom a few years ago and mitigates the risk associated with only having one laser soldering system available to production.”

Earl Yardley, Industrial Vision Systems Director, said: “We’re thrilled about the work we have completed with Zytronic. This new production cell combines all the latest automation know-how and is a pivotal technology for precision laser welding with closed-loop vision control. It was an incredibly exciting project to work on, which will accelerate Zytronic’s touchscreen manufacturing capability and flexibility.”

Zytronic’s continued investment in its UK touchscreen manufacturing operations positions the company to take maximum advantage of new opportunities as its global customer base recovers from the effects of the COVID-19 pandemic. Combining cutting-edge CNC and vision-based automation, the laser soldering unit is seen as a modern tool for the future of manufacturing technology. The machine’s software incorporates operator and material traceability, automatically saving the data to Zytronic’s manufacturing and QA system. This capability will enable statistical process control and data archiving for customer warranty and product traceability once the projective capacitive touch sensors are deployed in self-service, industrial and commercial applications around the world.

www.zytronic.co.uk

Why pharmaceutical label inspection using vision systems is adapting to the use of AI deep learning techniques

Automated inspection of pharmaceutical labels is a critical part of an automated production process in the pharmaceutical and medical device industries. The inspection process ensures that the correct labels are applied to the right products and that the labels contain relevant and validated information. These are generally a combination of Optical Character Recognition (OCR), Optical Character Verification (OCV), Print Quality Inspection and measurement of label positioning. Some manufacturers also require a cosmetic inspection of the label for debris, inclusions, smudges and marks. The use of vision inspection systems can significantly improve the efficiency and accuracy of the automation process, while also reducing the potential for human error.

Automated vision inspection systems can also help to ensure compliance with regulatory requirements for labelling, and provide manufacturers with a cost-effective and efficient way to improve the quality of their products. With increasing pressure to improve production efficiency and reduce costs, more and more pharmaceutical and medical device manufacturers are turning to automated vision inspection systems to improve their production processes and ensure quality products for their customers.

Over the last few years, more vision inspection systems for pharmaceutical label checks have been adapting to the use of deep learning and artificial intelligence neural networks, such as Convolutional Neural Networks (CNNs) or Recurrent Neural Networks (RNNs).

Using AI and deep learning for optical character recognition (OCR) can significantly improve the performance of automated inspection systems for pharmaceutical labels. Traditional OCR systems rely on pre-defined templates and rules to recognize and interpret text on labels, which can be limited in their ability to recognize text accurately in different fonts, sizes, and layouts.

AI-based OCR systems, such as those using deep learning, can be trained on a large dataset of labelled images, allowing them to learn and recognize different fonts, sizes, and layouts of text. This makes them more robust and accurate in recognizing text in real-world scenarios, where labels may have variations in their appearance. The deep learning machine vision systems can also be trained to recognize text that is partially obscured or distorted, which is a common problem in real-world scenarios. This allows the system to make educated guesses about the text, which can improve its accuracy and reliability.

On the flip side, while the level of recognition may improve for hard-to-recognise situations for traditional machine vision inspection, the system also must be validated to set criteria for FDA/GAMP validation. How can this be achieved for a neural deep learning system?

It is true that gathering data for training an AI-based vision inspection system can be a hassle, but it is a crucial step to ensure the system’s performance. One way to overcome this is by using synthetic, validated data, which can be generated using computer-generated images. This can reduce the need for natural images and allows a broader range of variations to be included in the dataset. These synthetic images could be tested and validated on a traditional machine vision set-up, before then transferred to the training set for the AI-based vision inspection. Another way is to use transfer learning, in which a pre-trained validated model is fine-tuned on a smaller dataset of images specific to the task. This can significantly reduce the amount of data and resources needed to train a new model.

In conclusion, validated industries such as medical devices and pharmaceuticals continue to adapt to new, robust methods for traceability and quality print checking. Deep learning is evolving to meet the unique validation requirements of these industries.

Your ultimate guide to GAMP validation for vision systems and industrial automation

You’re starting a new automation project, and vision inspection is a critical part of the production process. How do you allow for validation of the vision inspection systems and the machine vision hardware and software? This is a question we hear a lot, and in this post we’re going to drill down on the elements of validation in the context of vision systems for the medical devices and pharmaceutical industries. We’ll attempt to answer the questions by providing an overview of GAMP, a guide to key terminology and offering advice on implementing validation for your vision system and machine vision applications.

You’ll hear a lot of terminology and acronyms in industrial automation validation. So we’ll start by explaining some of the terms before drilling down on how the validation process works.

So what is GAMP? Good Automated Manufacturing Practice is abbreviated as “GAMP.” It’s a methodology for generating high-quality machinery based on a life cycle model and the concept of prospective validation. It was developed to serve the needs of the pharmaceutical industry’s suppliers and consumers and is part of any automation project. The current version of GAMP is GAMP 5. The full title is “A Risk-Based Approach to Compliant GxP Computerized Systems”.

The GAMP good practices were developed to meet the Food and Drug Administration’s (FDA) and other regulatory authorities’ (RAs’) rising requirements for computerised system compliance and validation in the industrial automation industry, and they are now employed globally by regulated enterprises and their suppliers.

GAMP was developed by experts in the pharmaceutical manufacturing sector, to aid in the reduction of grey areas in the interpretation of regulatory standards, leading to greater conformity, higher quality, more efficiency, and lower production costs. They tend to be methodological in nature, which in the context of machine vision matches the processes of industrial image processing.

So in layman’s terms, the GAMP and FDA validation is designed to prove the performance of a system in the fundamentals of what it is designed for and lays down the parameters and testing procedures to validate the process across the design, build, commissioning, test and production processes. In machine vision for industrial automation, this will be heavily biased towards the hardware and software specifications, along with the performance criteria for the vision system.

What is GxP that GAMP refers to? Simply, this refers to good practice, with the x in the middle referring to “various fields”. It refers to a set of guidelines and regulations that are followed in industries that produce pharmaceuticals, medical devices, and other products that have a direct impact on the health and well-being of people.

GxP guidelines and regulations are designed to ensure the quality, safety, and efficacy of medical device and pharma products. They cover various aspects of product development, manufacturing, testing, and distribution, as well as the training, qualifications, and conduct of the personnel involved in these processes.

GxP guidelines and regulations are enforced by regulatory agencies, such as the US Food and Drug Administration (FDA) and the European Medicines Agency (EMA), and non-compliance with these guidelines can result in fines, product recalls, and other legal consequences.
There are several different types of GxP, including:

  • GMP (Good Manufacturing Practice): This set of guidelines and regulations covers the manufacturing and testing of pharmaceuticals, medical devices, and other products. This is the most relevant to the validation of vision systems, inspection and machine vision in industrial automation.
  • GCP (Good Clinical Practice): This set of guidelines and regulations covers the conduct of clinical trials involving human subjects.
  • GLP (Good Laboratory Practice): This set of guidelines and regulations covers the conduct of laboratory studies involving the testing of chemicals, drugs, and other substances.
  • GPP (Good Pharmacy Practice): This set of guidelines and regulations covers the practice of pharmacy, including the dispensing and distribution of drugs and other products.

By following GxP guidelines and regulations and validation processes, companies can ensure that their products meet the highest standards of quality, safety, and efficacy, and that they are manufactured, tested, and distributed in a way that protects the health and well-being of their customers.

What is the ISPE? This is the “International Society for Pharmaceutical Engineering”. ISPE is an organisation that bridges pharmaceutical knowledge to improve the development, production, and distribution of high-quality medicines for patients around the world through such means as innovation in manufacturing and supply chain management, operational excellence, and insights into regulatory matters. The ISPE develops the GAMP framework, and GAMP 5 was developed by the ISPE GAMP Community of Practice (CoP).

So the above sets out the framework for validation and why it exists. We’ll now look at what processes are needed to fully validate a vision system into medical device and pharmaceutical manufacturing. On a high level the following critical steps are followed when validating a vision system in production:

1. Define the validation plan: This includes identifying the scope of the validation, the criteria that will be used to evaluate the system, and the testing that will be done to ensure that the system meets these criteria.

2. Install and configure the system: This includes setting up the hardware and software necessary for the system to function correctly, as well as configuring the system to meet the specific needs of the production process.

3. Test the system: This includes conducting functional tests to ensure that the system performs as intended, as well as performance and reliability tests to ensure that the system is accurate and reliable.

4. Validate the system: This includes verifying that the system meets all relevant regulatory standards and requirements, as well as any internal quality standards or guidelines.

5. Document the validation process: This includes documenting the testing that was done, the results of the tests, and any issues that were identified and corrected during the validation process.

6. Implement the system: This includes training production staff on how to use the system and integrating the system into the production process.

7. Monitor and maintain the system: This includes ongoing monitoring and maintenance of the system to ensure that it continues to function correctly and meets all relevant standards and requirements.

But each step needs to be broken down and understood in the context of the validation process relating to GAMP. The following lifecycle shows the typical steps required for the validation of the vision system in production.

What is a URS? A URS, or User Requirement Specification, is a document that outlines the requirements for a product, system, or service. It is typically created at the beginning of a project, and it serves as a roadmap for the development team, providing guidance on what the final product should look like and how it should function.

A URS typically includes a detailed description of the product’s intended use and user base, as well as the specific requirements that the product must meet in order to be successful. These requirements may include functional requirements (e.g., what the product should be able to do), performance requirements (e.g., how fast or accurately the product should operate), and quality requirements (e.g., how reliable or durable the product should be).

The URS is an important tool for defining and communicating the project’s scope and objectives, and it is often used as a reference document throughout the development process. It is typically reviewed and approved by stakeholders, including the development team, customers, and regulatory agencies, before the project begins.

In addition to serving as a guide for the development team, the URS can also be used to evaluate the final product to ensure that it meets all of the specified requirements. This process is known as “verification,” and it is an important step in the quality control process to ensure that the product is fit for its intended use.

The URS is the first document that is required for validation of the vision system (or other industrial automation system), it’s the base document which then leads on the FDS (Functional Design Specification) and the HDS (Hardware Design Specification) and the SDS (Software Design Specification) incorporated as part of that specification. These documents are typically provided by the vision system company as part of the scope of supply of a fully validated vision inspection solution.

What is an FDS? A Functional Design Specification (FDS) is a document that outlines the functional requirements of a product, system, or service. It describes the specific behaviors and capabilities that the machine vision inspection system should have in order to fulfill its intended purpose. The FDS typically includes a detailed description of the vision systems functional requirements, as well as any technical constraints or requirements that must be considered during the design and development of the inspection process.

The purpose of an FDS is to provide a clear and comprehensive understanding of the functional requirements of the overall inspection system, and to serve as a reference for the design and development team as you bring the product to life. It is an important tool for ensuring that the final vision system meets the needs and expectations of the end users.

An FDS may also include information on the vision user interface design, user experience design, and any other aspects of the product that are relevant to its functional requirements. It is typically developed early in the design process and is used to guide the development of the product throughout the project.

Prior to installation, the manufacturer will undertake a Factory Acceptance Test (FAT) which should be documented and agreed between the vision system supplier and the customer.

As the project progresses the applications team need to think about the three major milestones for test, commissioning and integration of the validated vision system – these include:

Installation Qualification (IQ) – this is the process used to verify that the vision system, equipment has been installed correctly and meets all relevant specifications and requirements. It is an important step in the validation process for ensuring that an inspection system is ready for use in a production environment.

During an IQ, a series of tests and checks are performed to ensure that the machine vision system has been installed properly and is functioning correctly. This may include verifying that all required components are present and properly connected, checking that all necessary documentation is complete and accurate, and verifying that the system or equipment meets all relevant safety and performance standards.

The purpose of IQ is to ensure that the vision system is ready for use and meets all necessary requirements before it is put into operation. It is typically performed by a team of qualified professionals from the customers side, and the results of the IQ are documented in a report that can be used to demonstrate that the system or equipment has been installed correctly and is ready for use.

Operational Qualification (OQ) – This is the process used to verify that the vision system complies with the URS and FDS. During an OQ, a series of tests and checks are performed to ensure that the system or equipment operates correctly and consistently under normal operating conditions. This may include verifying that the system or equipment performs all of its required functions correctly, that it operates within specified parameters, and that it is capable of handling normal production volumes.

Performance Qualification (PQ) – This is the final step and is performed by the final user of the vision system. It verifies the operation of the system under full operational conditions. It generally produces production batches using either a placebo or live product, dependent on the final device requirements.

All aspects of the validation approach are captured in the Validation Plan (VP), which, combined with the Requirement Traceability Matrix (RTM) remains live during the project’s life to track all documents and ensure compliance with the relevant standards and traceability of documentation.

Only after the completion of the Performance Qualification is the system validated, and ready for production use.

In summary. The process of validating a vision inspection system in an industrial automation system involves several steps to ensure that the system is accurate, reliable, and meets the specified requirements. These steps can be broadly divided into three categories: planning, execution, and evaluation.

Planning: Before beginning the validation process, it is important to carefully plan and prepare for the testing. This includes defining the scope of the validation, identifying the personnel who will be involved, and establishing the criteria that will be used to evaluate the system’s performance. It may also involve obtaining necessary approvals and documents, such as a validation plan or protocol.

Execution: During the execution phase, the vision inspection system is tested under a variety of conditions to ensure that it is functioning properly. This may include testing with different types of objects, lighting conditions, and image resolutions to simulate the range of conditions that the system will encounter in real-world use. The system’s performance is then evaluated using the criteria established in the planning phase.

Evaluation: After the testing is complete, the results of the validation process are analyzed and evaluated. This may involve comparing the vision system’s performance to the specified requirements and determining whether the system can meet those requirements. If the system fails to meet the requirements, it may be necessary to make modifications or adjustments to the system to improve its performance.

Throughout the validation process, it is important to maintain thorough documentation of all testing and evaluation activities according to GAMP 5 regulations. This documentation can be used to demonstrate the system’s performance to regulatory agencies or other stakeholders, and it can also be used as a reference for future maintenance or upgrades.

The process of validating a vision inspection system in an industrial automation system is a crucial step in ensuring that the system is accurate, reliable, and meets the specified requirements. By following a structured and thorough validation process, companies can ensure that their vision inspection systems are fit for their intended use and can help to improve the efficiency and quality of their operations.

How to select the correct machine vision lighting for your application

Machine vision lighting is one of the most critical elements in automated visual inspection. Consistent lighting at the correct angle, of the correct wavelength with the right lux level allows automated inspection to be robust and reliable. But how do you select the correct light for your machine vision application?

Where the inspection takes place on the production process has to be set according to the requirements of the quality check. This part of the process may also include what is often referred to as ‘staging’. Imagine a theatre, and this is the equivalent of putting the actor centre stage in the best possible place for the audience to see. Staging in machine vision is often mechanical and is required to:

  • Ensure the correct part surface is facing the camera. This may require rotation if several surfaces need inspecting
  • Hold the part still for the moment that the camera or lens captures the image
  • Consistently put the part in the same place within the overall image ‘scene’ to make it easy for the processor to analyse
  • Fixed machine vision lighting for each inspection process

Lighting is critical because it enables the camera to see necessary details. In fact, poor lighting is one of the major causes of failure of a machine vision systems. For every application, there are common lighting goals:

  • Maximising feature contrast of the part or object to be inspected
  • Minimising contrast on features not of interest
  • Removing distractions and variations to achieve consistency

In this respect, the positioning and type of lighting is key to maximise contrast of features being inspected and minimise everything else. The positioning matrix of machine vision lighting is shown below.

So it’s important to select the machine vision light relative to the position of the light with respect to the part being inspected.

Machine vision lighting is used in varying combinations and are key to achieving the optimal lighting solution. However, we also need to consider the immediate inspection environment. In this respect, the choice of effective lighting solutions can be compromised by access to the part or object to be inspected. Ambient lighting such as factory lights or sunlight can also have a significant impact on the quality and reliability of inspection and must be factored into the ultimate solution.

Finally, the interaction between the lighting and the object to be inspected must be considered. The object’s shape, composition, geometry, reflectivity, topography and colour will all help determine how light is reflected to the camera and the subsequent impact on image acquisition, processing, and measurement.

Due to the obvious complexities, there is often no substitute other than to test various techniques and solutions. It is imperative to get the best machine vision lighting solution in place to improve the yield, robustness and long term effectiveness of the automated inspection solution.

Stop chasing shorts and flash in medical device mould production by using 100% vision inspection

This month we look at the problem of flash and shorts in injection moulded medical device products and what the benefits are of automating an inspection process for flash and short detection. Medical devices are generally made up of an assembly of smaller plastic components, which together form an assembly. This could be part of a syringe system, testing kit, injection pen, sterile pack, caps, inserts, tubes, inhaler and medical tool holders – or a large assembly, such as breathing apparatus, medical machinery or diagnostic kits. Whatever the assembly or medical kit, the tolerances and fit of the medical device are normally of utmost importance, especially as most devices will be filled with a pharmaceutical drug of some kind or be used in a clinical setting. Flash and shorts could cause leakages, changes to the operation of the device, assembly faults or simply look bad to the user. Flashes and shorts in medical device components need to be rejected before they have a chance of reaching the end-user or the pharmaceutical supplier.

There are many things that can cause flash in plastic injection mouldings, such as mismatched parting lines, bad venting, low clamping pressure, low viscosity, and uneven flow. Some of these problems are caused by the tools, while others are caused by how the tools are used in the moulding machine.

Parting Lines that are mismatched: Dust, dirt, contaminants, and leftovers can make it hard for the two halves of an injection mould to fit together properly. If the holes in the mould are worn, they won’t fit together as well either. The metal surfaces of mould plates can also be deformed by pressure, and complicated part shapes can make it hard to close the mould.

Wrong Venting: Vents that are too big or too small can let out too much or too little air, depending on how old and worn they are. If the vents aren’t deep enough, stiff plastics may be able to stick out, and if the vents aren’t thin enough, fluids may be able to pass through.

Low Clamping Pressure: During injection moulding, the pack/hold phase makes sure that the cavity is completely filled, but it can also force the mould open. Even if the mould halves fit together tightly, plastic could leak out of the mould if the clamping pressure isn’t strong enough to stop this force.

Low viscosity and uneven flow: Depending on how the plastic is processed, it may flow too easily or fill the mould too quickly. For example, melt temperatures that are too high, residence times that are too long, moisture left over from drying that wasn’t done well enough, and using too many coolants.

Shorts, also called “short shots,” are parts that aren’t filled with enough plastic and often don’t have any details because of this. Sinks and parts that aren’t packed tightly enough can sometimes be caused by shorts or be a sign that shorts are starting. There are many things that can cause shorts, and it is important to figure out what they are before trying to fix them. A common cause is that the venting isn’t set up right, so gases can’t escape and plastic can’t flow into the cavity. Another common cause is that the non-return valve on the screw isn’t closing properly, which lets plastic flow backwards as the machine injects.

Many of the actions taken to eliminate flash can result in shorts and vice versa. These actions can be made via changes to the process, mould, or combination of the two. Whatever the solution to eliminate flash and shorts, there’s always the possibility they will be introduced into the product at a later date, and so 100% automated inspection of flash and shorts for medical devices is a perfect solution to stop bad products from getting into the market.

So you have your machine set and production running, but many process engineers end up chasing the process and firefighting the moulding processing, and so moving the goalposts between shorts and flash if the process starts to go out of sync. Using automated inspection can help control this problem and reduce the chase! The vision inspection systems can be interfaced directly with the Injection Moulding Machine (IMM), with products falling out of the tooling on the outfeed conveyor, which in turn can be the in-feed conveyor for a vision inspection machine.

Vision inspection of mould defects is achieved by moving the product either directly into a bowl feed for movement passed the cameras or via using a cleated belt conveyor, allowing the IMM robot to deliver the product to pockets which the vision system robot can pick and introduce into the inspection machine.

Vision systems for flash and short detection can find and measure the fault size, and even the XY location of the flash on the part, allowing statistical process control data of the medical device flash and short position to be logged, allowing process engineering to investigate the root cause of the problem. And remember, it is also possible to check for other defects during the inspection process, so if weld lines, chips, cracks, particulates or distortions are also an issue with the process, these can be incorporated into the automated inspection process. Automated inspection should form part of the validated process for medical device production.

The vision system allows 100% inspection of every moulded product, giving reassurance that the final product delivered to the customer is of the correct quality level, will fit, and won’t cause a leak! This allows you to stop the chase, knowing your flash and shorts will be automatically sorted and rejected at source.

How to use semi-automatic inspection of pharmaceutical vials and syringes for regulatory compliance.

Semi-automatic (or Semi-automated) inspection machines for the pharmaceutical industry are intended for easy and effective examination of vials, ampoules, cartridges, and syringes carrying injectable liquids, powders, or freeze-dried products. This is the step up from a manual inspection approach which would typically be done by a trained inspector by rotating the vial in front of a black and white background for the analyses of certain defects, particles and particulates. The semi-automatic approach allows for higher volumes of pharmaceutical products to be inspected at greater speeds.

In simple terms, “Semi-Automatic” means the ability to rotate the product and present it with the correct lighting LUX level on a black and white background for the purpose of an operator to visually identify defects in the container or contents. This is typically in the form of a stand-alone semi-automated machine or part of an in-feed or in-line production system. Therefore, this shouldn’t be confused with fully automated visual inspection systems.

The key documents relating to the inspection of pharmaceutical vials and ampoules for contamination are driven by the United States Pharmacopeia (USP) Chapter 1 Injections and Implanted Drug Products (Parenterals). Product Quality Tests states that injectable drug preparations should be designed to exclude particulate matter as defined in USP Chapters “787” Subvisible Particulate Matter in Therapeutic Protein Injections, “788” Particulate Matter in Injections, and “789” Particulate Matter in Ophthalmic Solutions. Each final container should be inspected for particulate matter, as defined in Chapter “790” Visible Particulates in Injections. Containers that show the presence of visible particulates must be rejected.

Particulates can take all forms, from contamination and debris particulates, coating fragments, air bubbles or inconsistencies, visual defects in primary containers, polymer particles through to glass & metallic particles and microscopic cracks or inclusions in the glass or polymer. All these levels of defects need to be identified and rejected.

Every product needs to undergo a visual inspection to determine whether or not it contains any particle matter. It is possible to automate, manually perform, or partially automate the initial 100% check. The subsequent inspection to ensure that the acceptable quality level (AQL) has been met must be carried out manually. The presumed value for the lower limit of the visible range is 100µm; however, this value can shift based on the product container, the nature of the drug product, and the qualities of the particulate matter (shape, colour, refractive index etc.).

The sample in its primary container (vial, prefilled syringe, and glass cartridge) is rotated under standardised conditions for semi-automated visual inspection (roughly above 50-100 µm). The liquid in the spinning and/or subsequently stopped container can then be viewed to confirm compliance to quality levels. This is the way to reach regulatory compliance by applying semi-automatic inspection.

Although the regulation of particulate matter in pharmaceutical products is as detailed above, there is no regulatory guidance on either the limits of particulate matter in principal packaging components. Instead, the specifications are determined through collaboration between the customers and the providers. To lessen the amount of particulate matter in finished drug products, pharmaceutical manufacturers and packaging suppliers must work together to achieve this goal. In particular, this can be accomplished by making use of components that have minimal levels of loose, embedded, and adhered particulates. But no matter what contingencies are put in place, the production process should include a level of semi-automatic inspection to allow rouge particulates to be rejected from the final product.

Human inspectors are adaptable and can provide a response to something they have never seen before or something that “doesn’t look right”. They are also able to more easily withstand typical variations in containers, particularly those generated by moulding, which results in a reduction in the frequency of wrongly rejected good products. This compares to fully automated visual inspection, which has rigid boundaries for a pass and fails. However, people are restricted in the number of inspections that can be performed (i.e., the number of containers per minute or hour that they can inspect). Therefore, semi-automatic inspection is the solution to allow a high volume of product to be inspected at speed by an operator while still complying with the relevant regulatory levels.

Operators are also prone to weariness and require numerous pauses in order to work at a high level for extended periods of time. All of these constraints contribute to a greater degree of variation in the outcomes of manual inspections; however, this variation can be reduced by semi-automated inspection, combined with receiving enough training and adhering to standard operating procedures.

Manufacturers should conduct a 100% inspection during the stage at which there is the greatest likelihood that visible particulates will be detected in the final container (for example, before labelling to maximise container clarity). This is the stage at which the likelihood that visible particulates will be detected in the final container is highest. The equipment and the physical environment in which the visual inspection will be performed should both be designed by the manufacturers to reduce the amount of unpredictability in the inspection process while simultaneously increasing the amount of information that can be gleaned from it.

After 100% semi-automated inspection is completed, a manual inspection based on ISO 2859-1/ANSI/ASQ Z1.4 should be performed. The size of the AQL sampling depends on the batch size. Inspection Level II should be used.

Overall, Semi-automatic inspection of pharmaceutical products provides a route to regulatory compliance prior to the adoption of fully automated visual quality control.